Car Battery Positive and Negative Identification Guide
Understanding how to tell car battery positive negative is crucial for anyone who owns a vehicle. Proper identification of battery terminals ensures safe handling and prevents potential damage to your car’s electrical system. This guide will walk you through the various methods to identify the positive and negative terminals of a car battery, along with safety tips and troubleshooting advice.
How to Tell Car Battery Positive Negative
Color-Coded Cables and Terminals
One of the simplest ways to identify the positive and negative terminals of a car battery is by looking at the color of the cables and terminals. Typically, the positive terminal is marked with a red cable, while the negative terminal is marked with a black cable. This color-coding is a universal standard, making it easy to identify the terminals at a glance.
- Red Cable : Indicates the positive terminal.
- Black Cable : Indicates the negative terminal.
Battery Case Markings
Car batteries often have markings on the case to help identify the terminals. These markings are usually symbols or letters that indicate the polarity of each terminal. Look for a plus sign (+) or the letters “POS” for the positive terminal, and a minus sign (-) or the letters “NEG” for the negative terminal.
- Plus Sign (+) : Positive terminal.
- Minus Sign (-) : Negative terminal.
Terminal Size Differences
Another way to distinguish between the positive and negative terminals is by their size. In many car batteries, the positive terminal is slightly larger than the negative terminal. This size difference helps prevent accidental reverse connections.
- Larger Terminal : Positive.
- Smaller Terminal : Negative.
Types of Car Battery Terminal Configurations
Top Post Terminals
Top post terminals are the most common type of battery terminal configuration. They are located on the top of the battery and are easily accessible for connections. This configuration is often found in older vehicles and is straightforward to identify.
- Location : On top of the battery.
- Accessibility : Easy to connect and disconnect.
Side Post Terminals
Side post terminals are located on the side of the battery. This configuration is less common but is used in some modern vehicles. Identifying the positive and negative terminals in this setup requires careful attention to the markings on the battery case.
- Location : On the side of the battery.
- Identification : Check battery case markings.
Dual Terminals
Some batteries come with dual terminals, offering both top and side post connections. This configuration provides flexibility in connecting the battery to different types of vehicles. Ensure you identify the correct terminal type before making connections.
- Flexibility : Supports multiple connection types.
- Identification : Follow standard color-coding and markings.
Recessed Terminals
Recessed terminals are designed to be flush with the battery case, reducing the risk of accidental short circuits. This configuration is less common but offers added safety. Identifying the terminals requires checking the battery case markings.
- Safety : Reduced risk of short circuits.
- Identification : Check for markings on the battery case.
Identifying Battery Polarity Symbols
Plus (+) and Minus (-) Signs
The most straightforward way to identify battery polarity is by looking for the plus (+) and minus (-) signs on the battery case. These symbols are universally recognized and indicate the positive and negative terminals, respectively.
- Plus Sign (+) : Positive terminal.
- Minus Sign (-) : Negative terminal.
POS and NEG Abbreviations
In addition to symbols, some batteries use the abbreviations “POS” and “NEG” to indicate the positive and negative terminals. These abbreviations are typically found near the terminals on the battery case.
- POS : Positive terminal.
- NEG : Negative terminal.
Red and Black Color Coding
Color coding is another method used to identify battery polarity. The positive terminal is usually marked with red, while the negative terminal is marked with black. This color-coding is consistent across most car batteries.
- Red : Positive terminal.
- Black : Negative terminal.
Tools for Testing Battery Polarity
Multimeter Usage
A multimeter is a versatile tool that can be used to test battery polarity. By setting the multimeter to the voltage setting and connecting the probes to the battery terminals, you can determine the polarity based on the reading.
- Set to Voltage : Use the voltage setting on the multimeter.
- Connect Probes : Red probe to positive, black probe to negative.
Battery Testers
Battery testers are specifically designed to check the health and polarity of car batteries. These devices provide a quick and easy way to ensure your battery is functioning correctly and that the terminals are properly identified.
- Quick Check : Provides instant results.
- Polarity Confirmation : Ensures correct terminal identification.
Voltage Indicators
Voltage indicators are simple tools that can help identify battery polarity. By connecting the indicator to the battery terminals, you can quickly determine which terminal is positive and which is negative.
- Simple Tool : Easy to use.
- Polarity Detection : Confirms terminal identification.
Safety Precautions When Handling Car Batteries
Wearing Protective Gear
When working with car batteries, it’s essential to wear protective gear to prevent injury. This includes gloves and safety goggles to protect against acid spills and electrical shocks.
- Gloves : Protects hands from acid and electrical shocks.
- Goggles : Shields eyes from potential splashes.
Proper Battery Handling Techniques
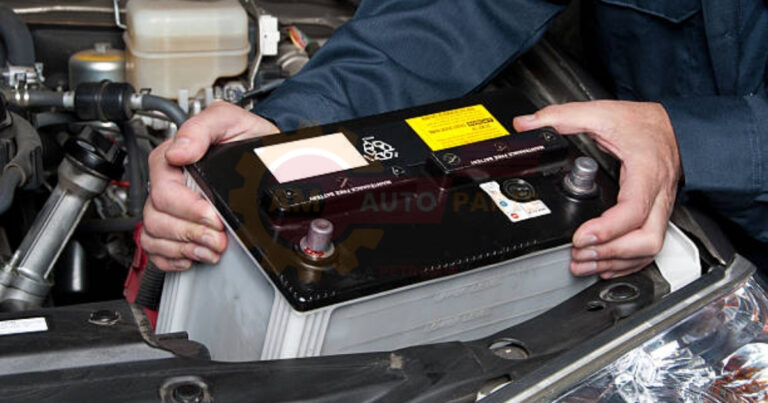
Handling car batteries requires care to avoid accidents. Always lift the battery with both hands and avoid tilting it to prevent acid spills. Ensure the battery is securely placed in its compartment.
- Lift with Both Hands : Ensures stability.
- Avoid Tilting : Prevents acid spills.
Avoiding Short Circuits
Short circuits can cause serious damage to your vehicle and pose a safety risk. Always ensure that tools and metal objects do not come into contact with both terminals simultaneously.
- Keep Tools Away : Avoid contact with both terminals.
- Check Connections : Ensure secure and correct connections.
Jumpstarting a Car Safely
Identifying Correct Terminal Connections
Before jumpstarting a car, it’s crucial to identify the correct terminal connections. Connect the positive cable to the positive terminal and the negative cable to a grounded metal surface on the car.
- Positive to Positive : Connect positive cable to positive terminal.
- Negative to Ground : Connect negative cable to a metal surface.
Proper Jumper Cable Order
The order in which you connect jumper cables is important for safety. Start by connecting the positive cable to the dead battery, then to the donor battery. Next, connect the negative cable to the donor battery, and finally to a metal surface on the dead car.
- Positive First : Connect positive cables first.
- Negative Last : Connect negative cables last.
Starting the Donor Vehicle
Once the cables are connected, start the donor vehicle and let it run for a few minutes. This allows the dead battery to charge before attempting to start the car with the dead battery.
- Run Donor Vehicle : Let it run for a few minutes.
- Charge Dead Battery : Allows for initial charging.
Replacing a Car Battery
Removing the Old Battery
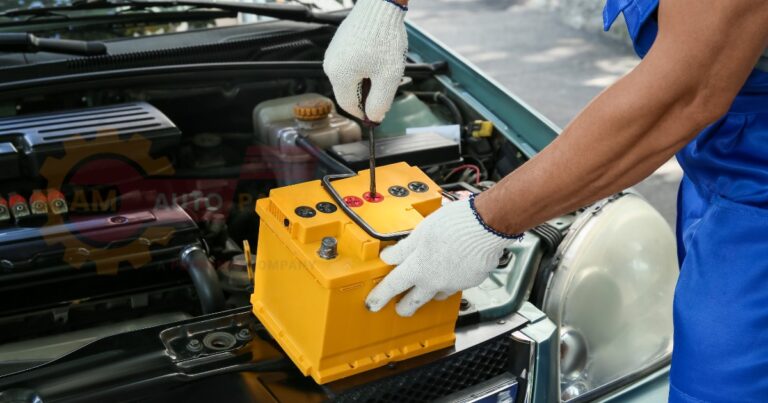
To replace a car battery, start by removing the old battery. Disconnect the negative cable first, followed by the positive cable. Carefully lift the battery out of its compartment.
- Disconnect Negative First : Ensures safety.
- Lift Carefully : Avoid spills and damage.
Installing the New Battery
Place the new battery in the compartment and secure it in place. Connect the positive cable first, followed by the negative cable. Ensure all connections are tight and secure.
- Secure Battery : Ensure it’s firmly in place.
- Connect Positive First : Follow correct order.
Ensuring Proper Terminal Connections
After installing the new battery, double-check the terminal connections. Make sure the cables are connected to the correct terminals and that they are tight to prevent any electrical issues.
- Check Connections : Ensure correct and tight connections.
- Prevent Issues : Avoid loose connections.
Maintaining Car Battery Terminals
Cleaning Terminal Connections
Regular cleaning of battery terminals is essential to prevent corrosion. Use a mixture of baking soda and water to clean the terminals, and a wire brush to remove any buildup.
- Baking Soda Mixture : Effective cleaning solution.
- Wire Brush : Removes corrosion buildup.
Applying Anti-Corrosion Products
To protect battery terminals from corrosion, apply anti-corrosion products. These products create a protective barrier that prevents the formation of corrosive substances.
- Protective Barrier : Prevents corrosion.
- Easy Application : Simple to apply.
Regular Inspection and Tightening
Regularly inspect battery terminals for signs of corrosion or loose connections. Tighten any loose connections to ensure the battery functions properly.
- Inspect Regularly : Check for corrosion and looseness.
- Tighten Connections : Ensures proper function.
Common Car Battery Issues and Troubleshooting
Dead Battery Symptoms
A dead battery can manifest through various symptoms, such as dim headlights, slow engine crank, or a clicking sound when turning the key. Recognizing these signs can help you address the issue promptly.
- Dim Headlights : Indicates low battery power.
- Slow Crank : Difficulty starting the engine.
Alternator Problems
Alternator issues can affect battery performance. If the alternator is not charging the battery properly, it can lead to frequent battery drain. Testing the alternator can help diagnose the problem.
- Frequent Drain : Indicates alternator issues.
- Test Alternator : Confirms diagnosis.
Parasitic Drain Diagnosis
Parasitic drain occurs when an electrical component continues to draw power from the battery even when the car is off. Identifying and fixing the source of the drain can prevent battery failure. Automotive energy storage helps cars store power for later use It includes batteries and fuel tanks in vehicles to keep them running Car voltage levels Most cars use a 12-volt electrical system to power lights and other components while some electric vehicles have higher voltage systems for their motors and batteries
Charge depleted battery means your device has no power left You need to plug it in to recharge the Battery symptoms deteriorate when your device starts losing power faster than usual or doesn’t hold a charge as long as it used to
Car battery recommendations Choose a battery that fits your car’s size and power needs and replace it every 3 to 5 years to keep your vehicle running smoothly BMS enhances longevity by helping our bodies work better and stay healthy for longer This system supports our cells and organs to function well as we age
Automotive power restoration challenges When a car’s battery dies or electrical system fails it can be tricky to get the power working again Mechanics need special tools and knowledge to fix these problems and get vehicles running
- Continuous Draw : Drains battery power.
- Identify Source : Fixes the issue.
Choosing the Right Car Battery
Battery Size and Type
Selecting the right battery size and type is crucial for optimal performance. Refer to your vehicle’s manual to determine the correct specifications for your car.
- Refer to Manual : Ensures correct size and type.
- Optimal Performance : Matches vehicle requirements.
Cold Cranking Amps (CCA)
Cold Cranking Amps (CCA) measure a battery’s ability to start an engine in cold temperatures. Choose a battery with a CCA rating that meets or exceeds your vehicle’s requirements.
- Cold Start Ability : Important for winter conditions.
- Meets Requirements : Ensures reliable starts.
Reserve Capacity
Reserve capacity indicates how long a battery can supply power if the alternator fails. A higher reserve capacity provides more time to address issues before the battery is completely drained.
- Power Supply Duration : In case of alternator failure.
- Higher Capacity : Offers more time for solutions.
By following this comprehensive guide, you can confidently identify car battery positive and negative terminals, ensuring safe handling and maintenance of your vehicle’s battery. Regular inspection and proper care can extend the life of your battery and prevent common issues.ad)
FAQ’s
Which terminal is ‘ground’ on a car battery?
The negative terminal is typically the ‘ground’ on a car battery. It is connected to the vehicle’s chassis, providing a return path for electrical current. This connection is crucial for the proper functioning of the car’s electrical system.
Why remove the negative battery cable first?
Removing the negative battery cable first is a safety precaution. It prevents accidental short circuits by disconnecting the battery from the vehicle’s chassis. This step reduces the risk of sparks and electrical shocks.
What happens when negative and positive terminals touch?
When negative and positive terminals touch, it creates a short circuit. This can lead to sparks, overheating, and potential damage to the battery and electrical system. It’s important to avoid such contact to ensure safety.
How long should I charge a vehicle battery?
The charging time for a vehicle battery depends on its capacity and the charger’s output. Typically, it takes about 4 to 24 hours to fully charge a car battery. Always follow the manufacturer’s guidelines for optimal charging.
What causes car battery corrosion?
Car battery corrosion is often caused by the release of hydrogen gas from the battery acid. This gas reacts with the metal terminals, forming a corrosive substance. Regular maintenance and cleaning can help prevent corrosion.


